Paper Airplane DIY – Make Your Own Unique Designs
Whether you’re looking for a paper airplane for an upcoming game of catch or you’re just looking for a unique craft project for your child, there are a number of different designs that you can create to make your paper airplane unique. These designs include making a launcher to launch your paper airplane, folding a paper airplane without forward facing pockets and using a rubber band to make your paper airplane fly fast.
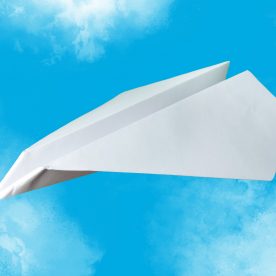
Folding a paper airplane without forward-facing pockets
Having the right folds is important to your paper airplanes’ performance. Having a good fold means the plane will perform well, but having an unsatisfactory fold means the plane will not fly very well. For this reason, this instructable will show you how to fold a paper airplane in a way that will give you the best results.
You need to remember to follow a few simple steps in order to successfully fold a paper airplane. You will also need to have a good flat surface to work on.
First, you will need to make sure the edges of the paper are perpendicular to each other. Then, you will need to make sure that the bottom edge of the flap is straight. This should be done by pressing along the crease line. This will make the crease sharper.

Once the crease is sharp, you need to fold the paper in such a way that the top half will be folded in half, with the bottom edge of the paper being flat. This will allow the air to be pushed downward, generating lift.
Once the bottom is flat, you can start to fold the flaps up. You should do this with the tip of the wing in mind. This will create a small triangle. It will be best if the wing tip pointing towards the sky, as opposed to pointing down.
Using a rubber band to get a paper airplane going fast
Using a rubber band to get a paper airplane going fast is not a new concept. Over the years, paper airplanes have come a long way. There are paper airplanes for all ages and abilities. Some are easy to make and fly well while others are more complicated and can be difficult to make. There are even turbo paper airplanes that can fly very far.
The first thing you need to do is make sure you have sturdy paper. The material used should be smooth, not glossy. This makes it easier to fold. You should also make sure that the wings are sturdy enough to withstand sudden force. You can load the paper airplane into the slot formed by the edges of file folders.

Next, you need to find a power source. You can use a battery, motor or electromagnet. You may need to build a prototype of your design.
You can then load the paper airplane into the launcher and launch it off. You should make sure the launcher is not touching the paper plane when you release it. It is also important to have a good wind-up. You will need a sturdy hand and a steady arm.
If you aren’t able to build your own, you can buy a rubber band launcher. They are inexpensive and are easy to use.
Making a launcher for a paper airplane
Using the right design, you can make your own launcher for a paper airplane. If you’re going to design a paper airplane launcher, you need to consider the angle of the launch, the thickness of the rubber band, and the strength of the motor.
Using the proper materials, you can build your own cardboard paper airplane launcher. This is a great STEM project for your class, or scout troop.
Whether you’re making your own paper airplane launcher or purchasing one, you can use these easy tips to get the most performance out of your paper airplane. A good design and integrated power scale will help ensure the best results.
First, decide on a cardboard base for your launcher. The base should be at least 24 inches long by four inches wide. The longer piece of cardboard should have two short slits at the bottom of the V. The shorter piece should have a 1-inch slit at the bottom.
Next, hang a paper clip from a wooden craft stick. The paper clip should be positioned so that it pokes through the center crease of the plane.
After the paper airplane is in the launcher, you can release the rubber band to get it flying. To stretch the rubber band, pull back on it. The length of the rubber band will also affect how far your plane flies.